In this article, we will focus on the installation of keystone patch panel. Previously, we have introduced many solutions for cable management, such as horizontal/vertical organizers, patch panels, rack mounted enclosures, etc. In this post, we will take the keystone patch panel as a case to illustrate how to install it.
An Overview of Keystone Patch Panel
Before the installation, let’s have an overview of the keystone panel. This is also regarded as the preparation stage, which has a great impact on your following installation.
Keystone patch panel, also called blank patch panel or unloaded patch panel, is a kind of Ethernet patch panel. Unlike the pre-loaded patch panel, the keystone panel is not configured with built-in RJ45 ports. To set keystone jacks such as Cat5e and Cat6, the keystone panel is often available in two types: 24-port patch panel and 48-port patch panel.
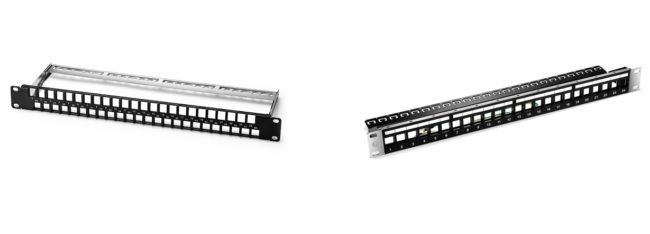
Figure 1: 48 Ports 1U Blank Keystone Patch Panel (Left) and 48 Ports 1U Blank Keystone Patch Panel (Right)
With different standards, such as ports and keystone jacks, the keystone panel can be classified variously.
According to ports, there are 24-port keystone patch panel and 48 ports panel version. Usually, the 24-port patch panel version is an unshielded/shielded Ethernet patch panel in a compact 1U with STP/UTP. It can accommodate all keystone jacks, including RJ45 Ethernet, HDMI audio/video, voice and USB applications. While the 48 ports panel version can be used as 1U rack-mount unshielded multimedia blank patch panel, also compatible with all keystone jacks.
Classified by keystone jacks, we can also get different types. When the keystone panel is inserted with jacks, we also call the panel as keystone jack panel. Among all kinds of RJ45 keystone jacks, Cat5e and Cat6 keystone jacks are used frequently.
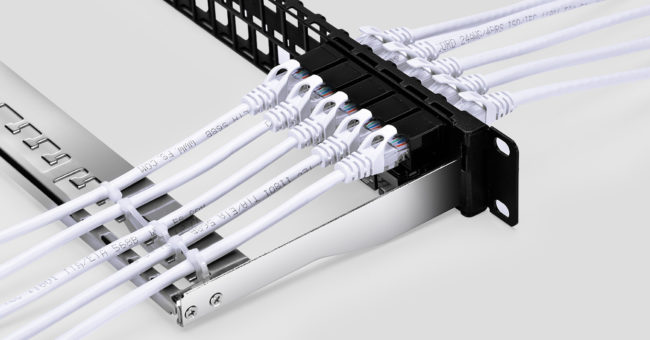
Figure 2: 48 Ports Blank Keystone Patch Panel Cabling
Installation Guide
After the preparation step, it’s time for us to move to the installation stage.
First, proper RJ45 jacks should be chosen. As we mentioned before, unlike pre-loaded or fixed patch panels, keystone patch panels have no built-in ports. Therefore, you need to decide the type and quantity of the jack at first.
Second, insert the RJ45 jacks. After choosing the proper RJ45 jack, it’s time for you inlaying the jacks into the slots of keystone panels, from the rear panel to the front.
Third, install the equipped Ethernet patch panel into a 1U rack with the help of screws and screwdriver.
Fourth, plug cables that you have chosen into corresponding jacks you have inserted into the keystone patch panel.
Fifth, manage cables with the help of cable management accessories such as cable managers, lacing bars and cable ties.
If you are still unclear about the installing process, you can refer to the following video made by FS: Blank Keystone Patch Panel for Cat5e/Cat6 Ethernet Cabling.
Conclusion
Keystone patch panel just likes a joker for its easy matching. It can be customized for users’ cabling requirements. Moreover, installation is also easy to catch. In any case, the keystone panel is a wise choice for anyone requiring easy and direct access for Ethernet cabling.