In the world of fiber splicing, fiber cleaver is an important tool that cleaves the fibers to be spliced precisely. It is the warranty of a good splicing because the quality of the splice will depend on the quality of the cleave. And high quality fiber breaks with clean surfaces are the yardstick for good fiber cleavers. This article will provide some knowledge about fiber cleavers.
In optical fiber, a cleave means a controlled break that intentionally creates a perfect flat end face which is perpendicular to the longitudinal axis of the fiber. Fiber optic cleaver is used in most production lines. It can give a precise cut at a cleave angle of 90 degrees to the fiber end. Cleavers are available for both single fiber or ribbon fibers.
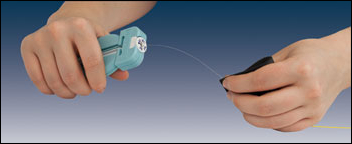
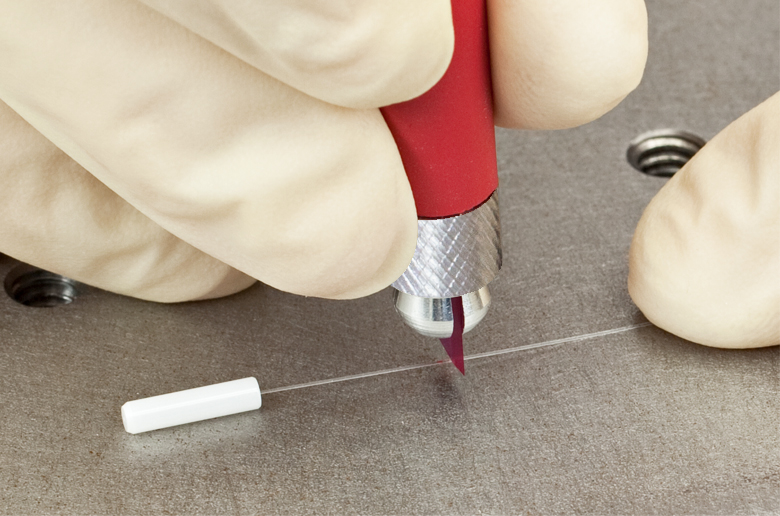
Two kinds of fiber cleavers are often seen in the market. First is the pen-shaped scribe cleaver, which looks like a ballpoint pen. It has small wedge tip made of diamond or other hard materials. Scribe cleaver is a traditionally low-cost fiber cleaving tool using the scribe-and-pull method to cleave the fiber. The operator may scribe the fiber manually and then pull the fiber to break it. But it is difficult to achieve high cleaving accuracy by this tool.
Therefore, in order to solve the problem of accuracy, the precision cleaver is introduced to the industry. This might cost you much higher than the scribe cleaver, but your working speed and efficiency can be greatly improved since multiple fibers can be cleaved at one time. With the extensive applications of fusion splicers, precision cleavers are favored by operators to avoid splice loss.
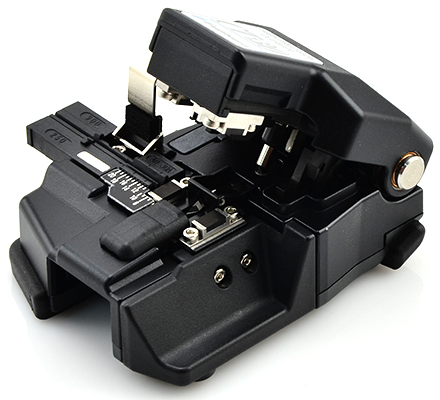
Precision cleaver is the mechanical device, which looks a little difficult for novices to deal with. Here are some simple steps that you can follow when using the precision cleaver:
- Step one, open the fiber clamp.
- Step two, press down on the button and slide the carriage back.
- Step three, move the fiber slide back until it stops.
- Step four, clean the stripped fiber with a solution of greater than 91% ISO alcohol.
- Step five, place the stripped and cleaned fiber into the slot at the desired cleave length.
- Step six, while maintaining firm pressure on the buffer, move the fiber slide forward until it stops.
- Step seven, close the fiber clamp.
- Step eight, slide the carriage forward.
- Step nine, lift the fiber clamp.
- Step ten, move the fiber slide back.
- Step eleven, remove the fiber, which is now cleaved to the proper length.
- Step twelve, remove and properly dispose of the scrap fiber.
Make sure you comply with these precautions during the process of fiber cleaving:
- First, wear a pair of safety glasses. This can protect your eyes from accidental injury. It is highly recommended when handling chemicals and cleaving fiber.
- Second, be careful when using ISO alcohol. Keep the ISO alcohol away from heat, sparks and open flame. This is because the ISO alcohol is flammable under the flash point of 73° F. It can also cause irritation to eyes on contact. In case of eye contact, flush eyes with water for at least 15 minutes. Moreover, inhaling fumes may induce mild narcosis. In case of ingestion, consult a physician.
- Third, store cleaved glass fibers in proper place. Since cleaved glass fibers are very sharp and can pierce the skin easily. Do not let cut pieces of fiber stick to your clothing or drop in the work area where they can cause injury later. Use tweezers to pick up cut or broken pieces of the glass fibers and place them on a loop of tape kept for that purpose alone.
Having a qualified fiber cleaver enhances the cleaving precision and efficiency. Nowadays, precision cleaver has been widely applied to accurate fusion splicing. Proper investment is valuable for the long-term applications. If you want to get one for your project, FS.COM is a good place to go.