Tag Archives: fiber optic patch panel

Networking Patch Panel Wiki, Types, and Purposes

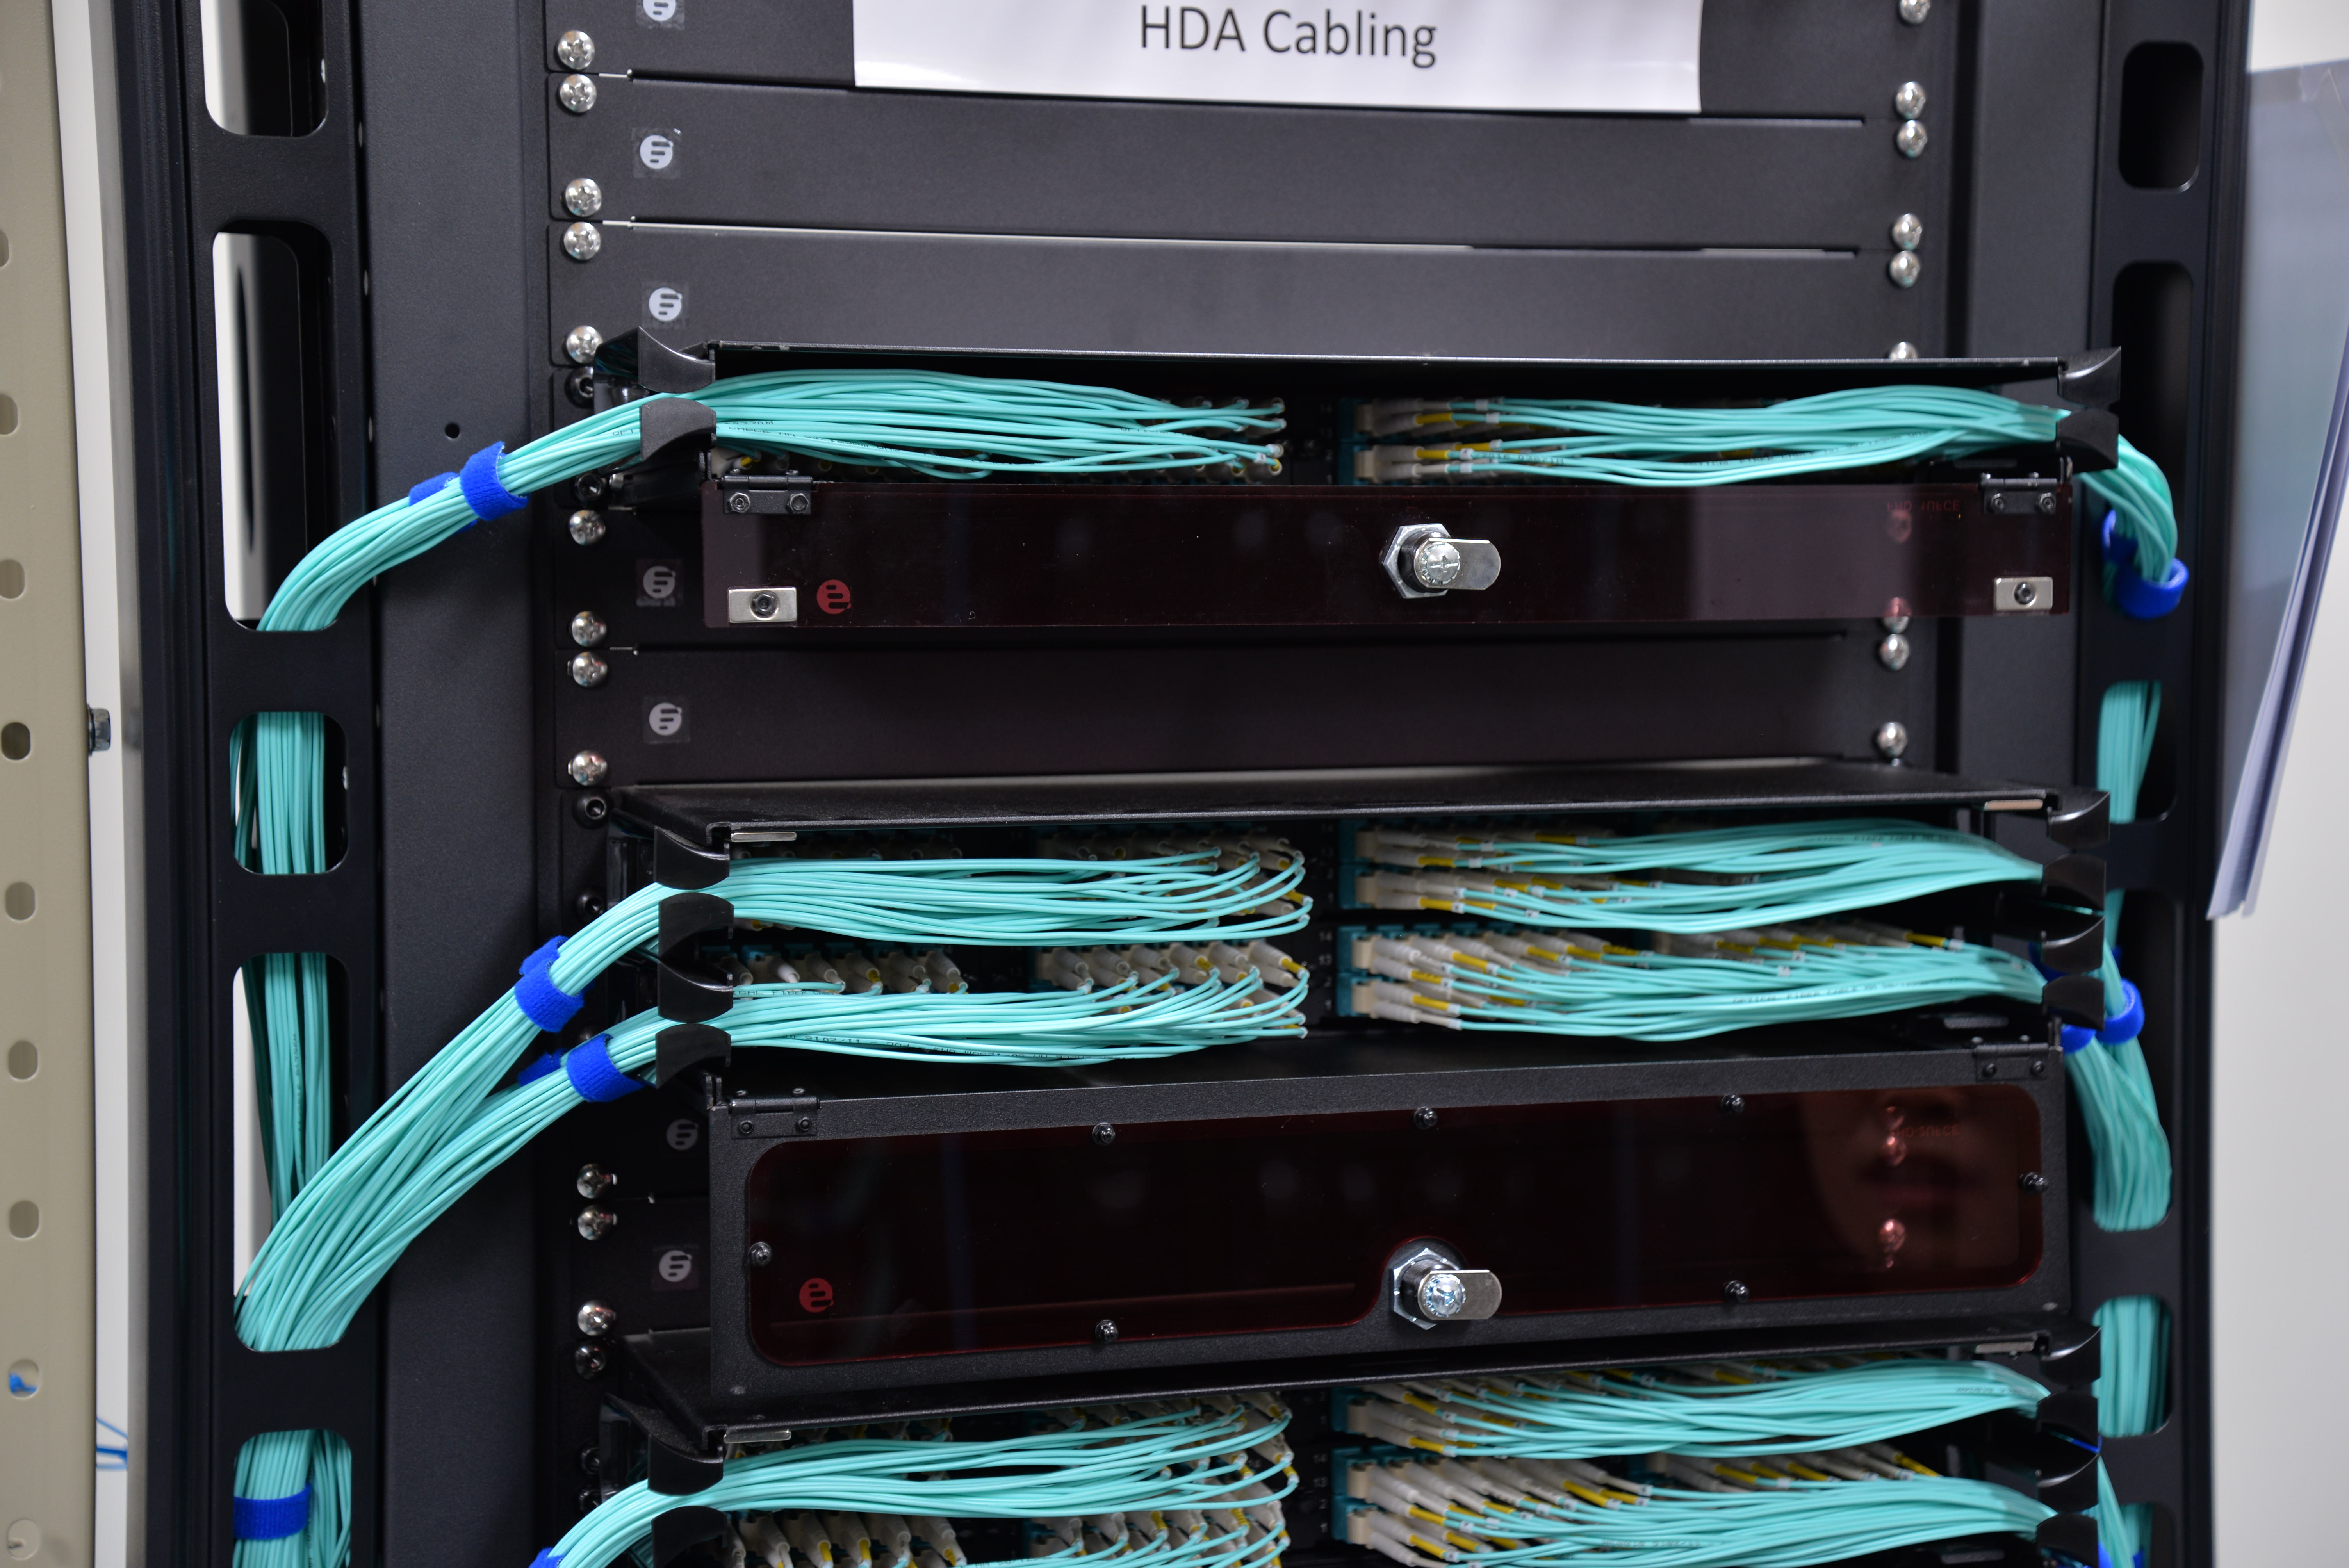
Networking patch panel has been an indispensable part in daily cabling. Whenever setting up connections for all sorts of devices, like servers and switches, you have to deal with a large number of input and output cables. Under such a circumstance, the patch panel for networking will do help to effectively manage those cumbersome cables. Then, a series of questions about patch panel in networking ensued. In this post, what a networking patch panel is and why it is needed will be answered.

Network Cabling

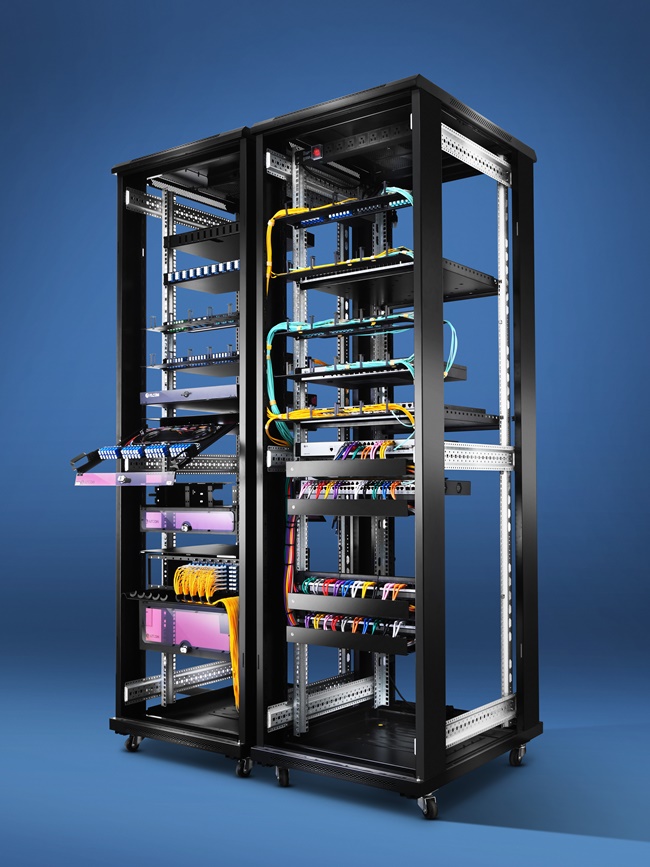
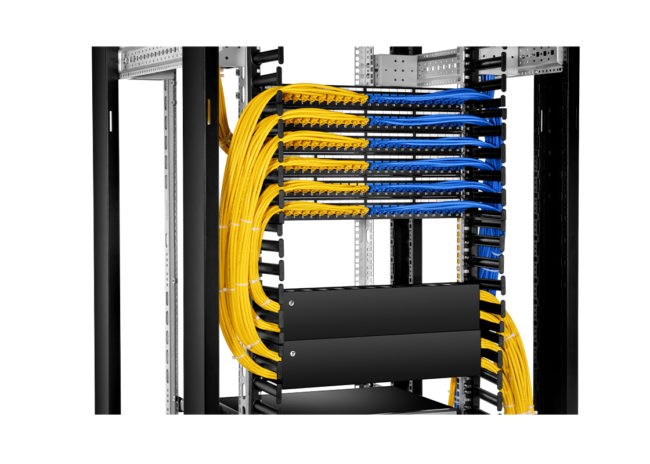
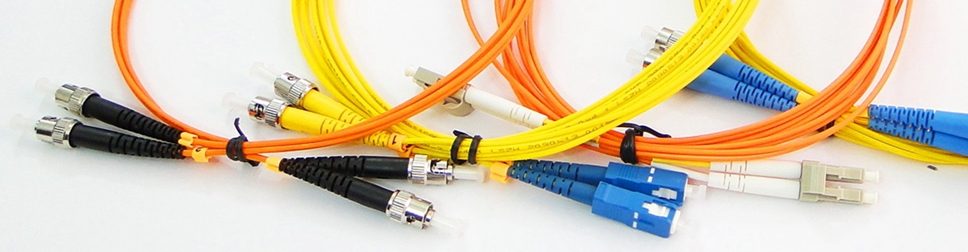
Figure 1: Network Cabling

What is the Networking Patch Panel

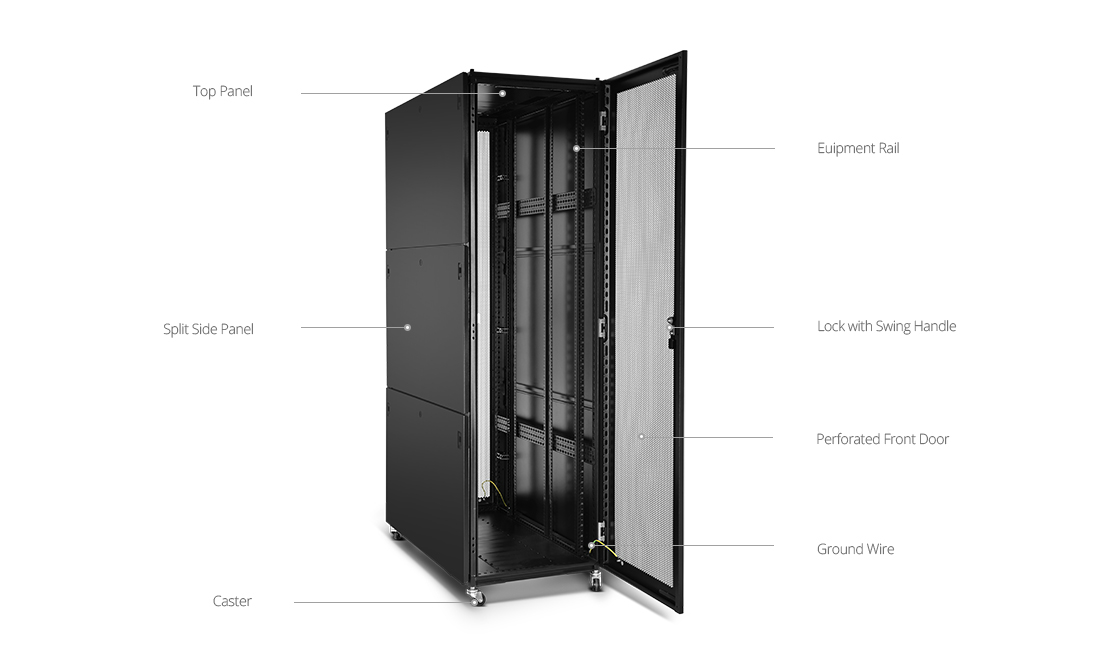
Networking patch panel, a kind of cable organizer, is designed to connect and manage copper or fiber optic cables coming in or out. Usually, in networking patch panel cabling, the panel will be attached to racks or enclosures in wiring closets or on walls. Then, patch cords will be used to connect ports in patch panels to ports in servers or network switches.

Types of Networking Patch Panel

Basically, according to the cables connected, there are two types of networking patch panel: Ethernet patch panel and fiber optic patch panel.

Ethernet Patch Panel

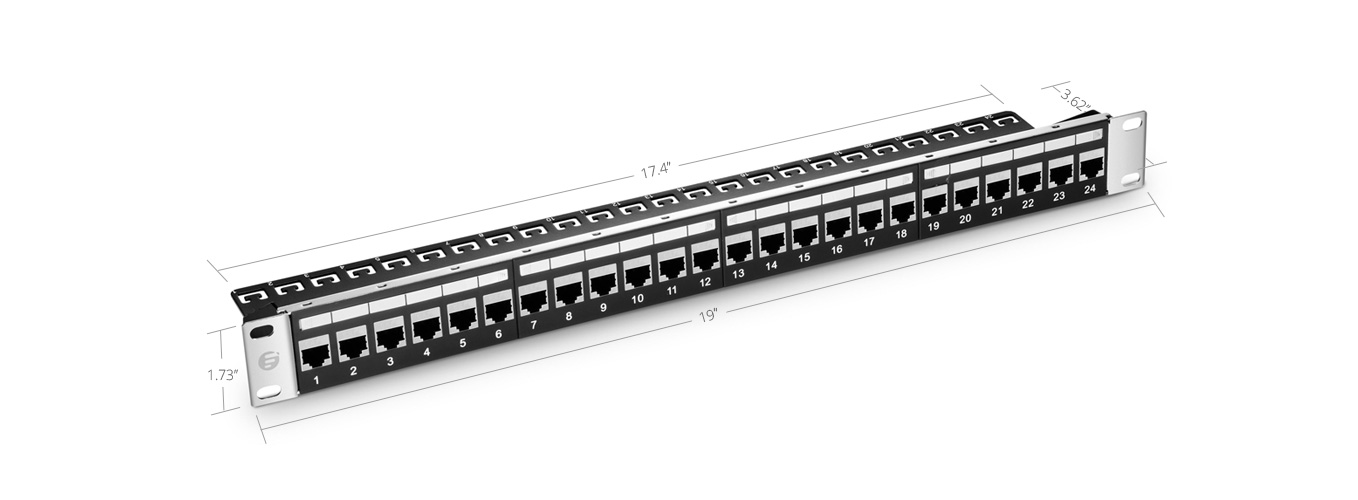
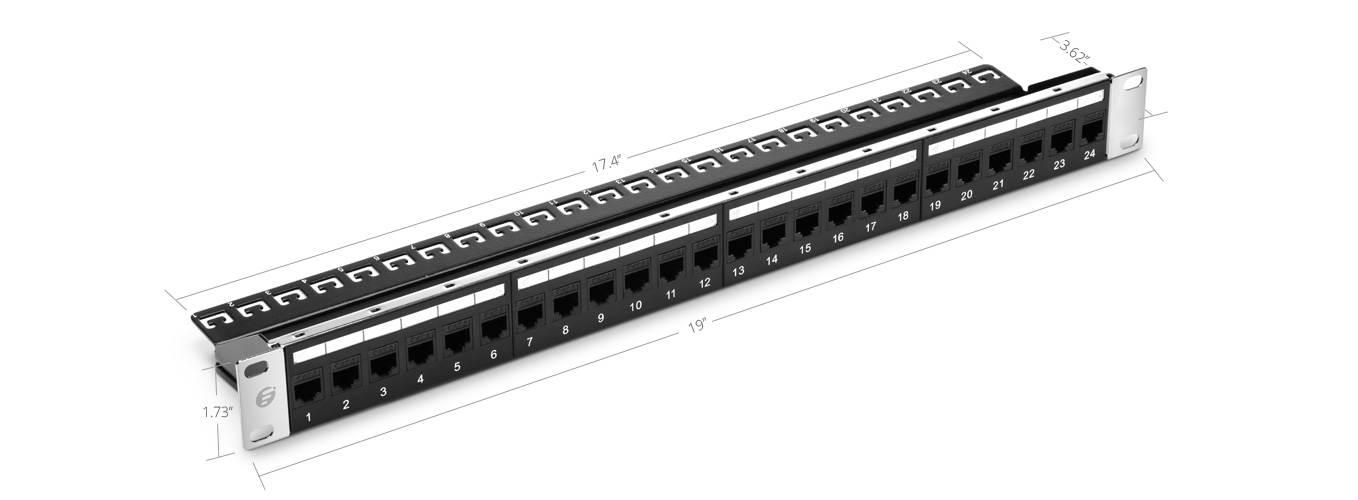
Ethernet patch panel, also called copper patch panel, provides interconnections for Ethernet applications in local area network. There are many types of Ethernet patch panels, among which Cat5e patch cable, Cat6 patch cable, and Cat6a patch cables are commonly used in network cabling. As for ports of the copper patch panel, various options also can be found, such as 24 ports and 48 ports. If you want to buy an Ethernet panel, you still have to consider its designs: shielded or unshielded, flat or angled, punch down or feed-through, and loaded or unloaded. With various options, you can always find a needed type.

24 Ports Blank Keystone Ethernet Patch Panel (Left) and 24 Ports Cat6 Shielded Feed-Through Patch Panel (Right)

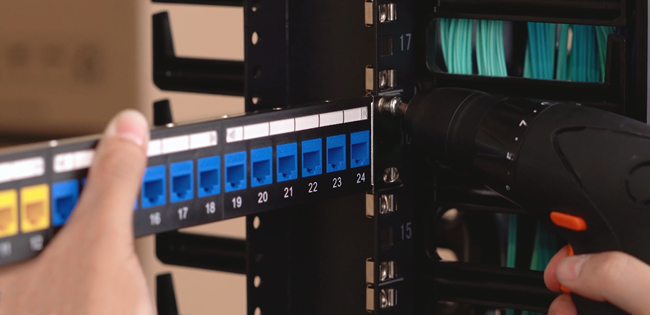
Figure 2: 24 Ports Blank Keystone Ethernet Patch Panel (Left) and 24 Ports Cat6 Shielded Feed-Through Patch Panel (Right)

Fiber Optic Patch Panel

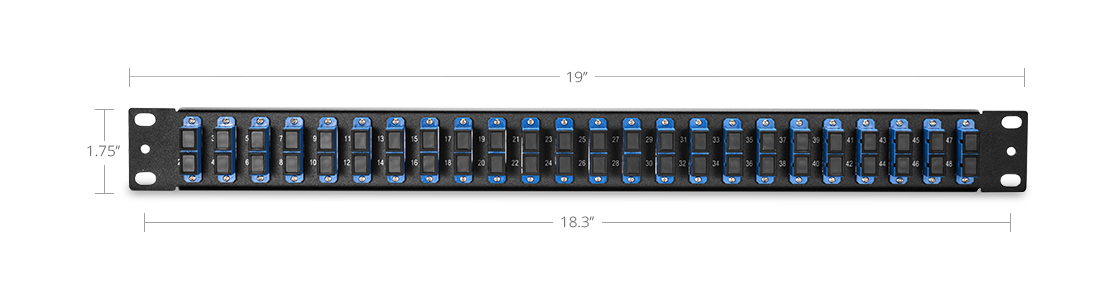
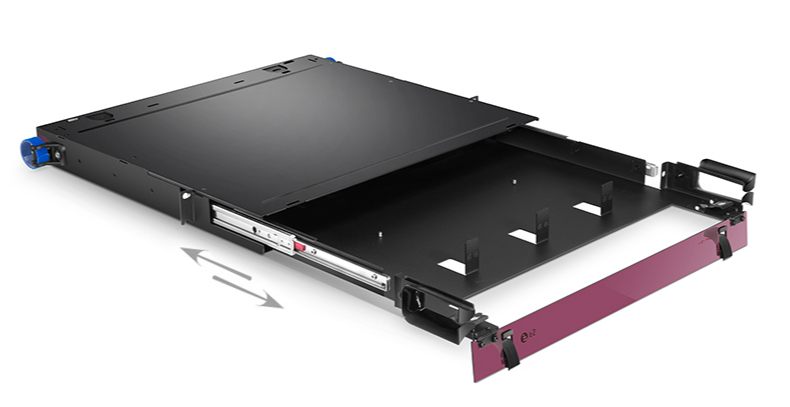
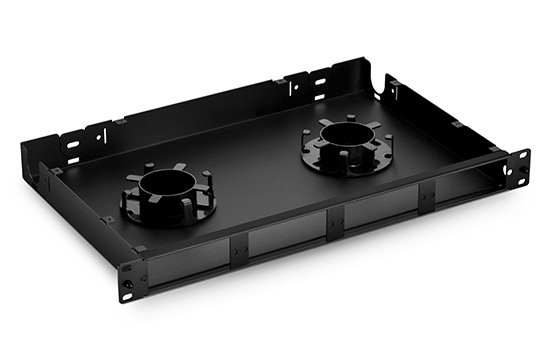
Fiber optic patch panel, the other branch of networking patch panel, is designed to organize fiber cables. Similar with Ethernet patch panels, the fiber optic patch panels also are varied in designs, such as adapter types, fiber types and fiber count. Conventionally, fiber optic patch panel is commonly used as rack mount fiber patch panel or wall mount patch panel, which also applied for the Ethernet patch panel.

Blank Fiber Patch Panel (Left) and FHU 1U 48F SC Patch Panel (Right)

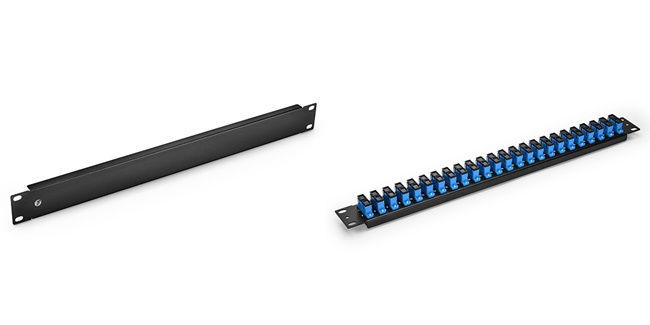
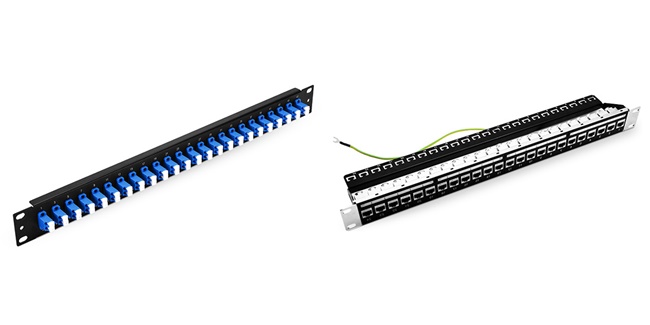
Figure 3: Blank Fiber Patch Panel (Left) and FHU 1U 48F SC Patch Panel (Right)

Benefits of Patch Panel in Networking

Knowing what the networking patch panel is just partly solves the concern, what is the purpose of patch panel in networking? Understanding the benefits of network patch panel, the question can be solved. Commonly, there are four major benefits shared by networking patch panels:

First, saving time. With a patch panel in networking, changes and repairs of cables are much easier for IT technicians. They don’t need extract time to clear and identify cables.

Second, space saving. Without messy cabling, you can organize cables in a neat and orderly way. Especially, for high-density cabling, a networking patch panel can help you save a lot of space.

Third, reducing the signal interference. When cables separated in an organized way, it will greatly lower the chance for crosstalk and interference between them. As a result, the networking performance will also be enhanced greatly.

Fourth, cost reducing. With previous benefits, it will definitely bring about cost reduction. You don’t need to spend extra money on repairing, managing and future network expansion.

Summary

After revealing what the patch panel is and why it is used, it’s easy to find the networking patch panel is the best solution to manage cables, no matter in the office or home network. As we mentioned, there are various benefits of networking patch panels. However, if you want to make a full advantage of those benefits, a wise use of patch panels is needed. For detailed information about how to wisely use patch panel manage cables, you can refer to the article: Best Patch Panel Cable Management Techniques.

How to Install a Rack Mount Patch Panel?

When looking at the title, especially the words “Rack Mount Patch Panel”, will you hesitate for a moment? Yes, I do. I am thinking what the blood tie does it have with a patch panel and whether it needs to be installed differently. Taking this chance, we will have an exploration for these doubts.

What is a Rack Mount Patch Panel?

It’s easy for us to understand what is a rack mount patch panel. Firstly, you need to bear in mind it’s definitely a patch panel. Sharing the same blood with a patch panel, patch panel rack version is also a mounted hardware assembly containing ports to connect and manage the incoming and outgoing fiber or copper cables. Then, you need to differentiate the rack mount patch panel with wall mount patch panel, the other type of patch panel. When a patch panel associated with the rack mount, it refers specially to a kind of patch panel connecting with racks or rack mount enclosures in a typical data center network.

Rack Mount Patch Panel Cabling

Figure 1:Rack Mount Patch Panel Cabling

Types of Rack Mount Patch Panel

Basically, the rack mount patch panel consists of fiber optic patch panel and copper patch panel used for different applications.

For a rack mount fiber optic patch panel, it is mostly designed for the standard 19-inch rack. Depending on the number of connections required, it is often available in 1U, 2U, 4U configurations with flat or angled design. Typically, the rack mount fiber patch panel has four empty slots where LC/SC fiber adapter panels or cassettes can be installed prior to or during deployment. All in all, according to the space and requirements of your project, there will always be an optical fiber panel suiting for you.

The other type is the copper patch panel. The copper patch panel can be inserted with both shielded or unshielded copper cables like cat5e, cat6, cat6a, and cat7. Among all these types, the cat6 patch panel is the most favored one used for the Gigabit Ethernet high-density cabling. In addition, all these types of rack mount copper panels are available in 24 ports and 48 ports in the market.

24 Ports 1U Rack Mount Fiber Optic Patch Panel (Left) and 24 Ports 1U Shielded Cat6 Rack Mount Patch Panel (Right)

Figure 2: 24 Ports 1U Rack Mount Fiber Optic Patch Panel (Left) and 24 Ports 1U Shielded Cat6 Rack Mount Patch Panel (Right)

Steps of Installing Patch Panel in Rack

Clearing about the rack mount patch panel is just a warming-up step for a better installation. Generally, there are three main steps for users to install a blank rack mount patch panel. If a pre-loaded rack mount is held, you can directly start from the second installation step.

Preparation

Before installation, the user should evaluate how many rack units are going to be used. Then you can decide the number and the size of the patch panel. After that, you need to choose the jacks that you are going to use. Then you can install the jacks into the patch panels.

Installation

First, you can hold the drawer of patch panel at the height of the layer of the rack you need to set and push it forwardly. Then you need to use the appropriate machine screws to attach the patch panel assembly to the rack.

Installing Rack Mount Patch Panel

Figure 3: Installing Rack Mount Patch Panel

Second, insert cables into the matching port one by one. After that, you can use a strap to secure the cables. Typically, for fiber optical cables, we would prefer to use a Velcro cable tie to strap; while copper cables, we would use Nylon cable tie.

Third, if there is a need, you can write specific information on labels for identification.

Validation

Finishing the second step, you still need to make a visual inspection to ensure the safety of all the network environment. After following all these three steps, the installation can be finished.

Conclusion

Rack mount patch panel is the most popular solution to manage cables in dater center network. Especially, there are plenty of types of rack mount patch panel for choosing, which have been proved to be a kind of future-proof management. It’s practical and wise for us to learn how to use it.

Introduction of Patch Panel Types

Patch panel, an unsung hero, is the most important cable management tool of the data center. When you want to connect a vast number of devices to a central server or other network hardware, there must be plenty of various cables, and you have to plan each thing out properly. It’s always smart to use a patch panel to help you manage the cables and keep your server room organized. However, patch panels are available in different ports and applied in various cables, like 24 port or 48 port patch panel, Cat5e or Cat6 patch panel. There are so many patch panel types on the market that make you confused. Usually, patch panels can be used in two systems, fiber and copper cabling systems. Therefore, patch panel types will fall into two main categories, fiber optic patch panel and Ethernet patch panel.

Fiber Optic Patch Panel

Fiber optic patch panel is applied in distributing the single mode and multimode fibers to realize the connection, allocation and scheduling between the weak trunk and level system. Often times, two ports stand together on a panel are prepared to connect a pair of wires. One port acts as the transmitting end while the other is the receiving end. Due to different port designs like SC, LC, FS.COM launched LC patch panel and SC patch panel with 24 ports and 48 ports, and blank patch panel.

LC Fiber Patch Panel

Constructed of light weight, high strength steel with black coating, a 24 port patch panel is robust and designed to be installer-friendly. The design includes integrated cable management features to connect 48 single mode or multimode fibers, and provide proper strain relief for those fibers. Often times, the panel used to connect single mode fibers adopts the blue design, while multimode type takes aqua. The following figure is an example of single mode LC patch panel.

 LC patch panel

Figure 1: 24 Port LC Fiber Patch Panel

SC Fiber Patch Panel

This 24 port SC patch panel is made almost the same size with the LC fiber patch panel but in different port. Designed for OS2 fibers, it uses the blue design.

SC patch panel

Figure 2: 24 Port SC Fiber Patch Panel

Blank Patch Panel

The 1U blank panel fits all 19 inch standard server rack and cabinets. The panel uses metal material which helps ensure superior thermal insulation performance. It’s an ideal tool for improving airflow within the rack by covering the unused spaces.

blank patch panel types

Figure 3: 1U 19″ Rack Blank Panel

Ethernet Patch Panel

Functioned like the fiber optic patch panel, Ethernet patch panel is used to connect specific cables like Cat5e, Cat6 cables, creating a standard-based and flexible copper platform. Designed for shielded and unshielded cables, FS.COM published shielded/unshielded Cat5e patch panel and Cat6 patch panel.

Cat5e Patch Panel

This 24 port shielded Cat5e patch panel enables quick and easy cable patching by plugging Cat5e cables into any of its RJ45 ports. Made from SPCC and ABS plastics material, it can stand up to the conditions where the temperature varies from -25°C to 70°C. Clearly numbering on the front allows for easy identification of cable runs. With the connections of 24 Cat5e cables, this 1U rack mount patch panel will maximize your network performance.

cat5E patch panel

Figure 4: 24 Port Cat5e Patch Panel

Cat6 Patch Panel

This 1U rack mount unshielded Cat6 patch panel is designed with the same process of 24 port Cat5e patch panel. This 24 port patch panel for Cat6 cable is rated up to 1Gbps and meet T568A/T568B standard, which will keep up with the greatest of changes in your network.

cat6 patch panel

Figure 5: 24 Port Cat6 Patch Panel

Conclusion

When you decide to buy one, figure out what cables you need to connect first, then choose the suitable patch panel. FS.COM offers a comprehensive line of patch panel types to support your data center patching needs in current 10G and next generation 40G or 100G applications.

How to Deal with Server Room Cabling Nightmare

It’s well known that server room has become an important indicator of one’s healthy network. Although wireless technology can avoid the possibility of cable clutter when compared with the wired connection, sever rooms still have lots of network cables, fiber optic cables and peripheral wiring. Thus server room cabling nightmare may appear if the big amount of cables on the server rack is disordered. For installers and engineers, it’s important to avoid server room cabling nightmare to ensure a well operated network center.

Reasons to Avoid Server Room Cabling Nightmare

Often times, the server room cabling nightmare is related to crowding and stacking things. For example, new equipment may be piled up around or on the top of the old equipment. Disordered cables look like a big bowl of spaghetti that may wreak havoc on the server environment.

  • It costs you in equipment wear and tear. When the excessive cables and extra equipment are placed together in a server rack, it may result in equipment overheating since the cables block the airflow or ventilation, generating much heat and stress, which may eventually lead to slow-down and even shorten the life of all equipment.

  • It costs you time and money. The fiber cables and power cables will easily become twisted if the cables are not managed well. In turn, this will cost you a large amount of time to dig through the server mess when you want to change the specific or broken cables.

Tips for Organizing Server Room Cabling

To avoid server room cabling nightmare, here are several tips for you to organize the cabling.

  • Make the server room dust-free. Dust not only makes the room look dirty, it also can fall into the hardware and cause equipment failure especially when it piles up inside the hardware vents. Therefore, the heat can’t be dissipated from the equipment which will lead to overheating. Thus, the server room should be cleaned every day to prevent dust accumulation.

  • Apply sound cable management. Poor cable management will not make positive effects on network system, instead, it may cause hardware malfunction. Proper cable management tips contain the colored labels for identifying, suitable fiber optic enclosures for cable managing. In this way, the cables can be protected from winding.

  • Spacing the equipment. When you decide to set up the server room, make sure that you have planed where to place the racks. A suitable distance should be measured between each rack for air dissipation and future expansion. In addition, the location of equipment such as fiber optic patch panel and switches in a rack should be considered.

End Server Room Cabling Nightmare with FS.COM Equipment

There are several equipment from FS.COM to help you maintain a neat and tidy server room, avoiding server room cabling nightmare.

42U Server Cabinet  

42U black server cabinet can accommodate all 19 inch EIA standard networking equipment, providing additional space at the rare for cable management. It consists of several major components, top panel, split side panel, equipment rail, and perforated front door. In the back, it adopts the design of air mesh which allows ventilation and heat dissipation. The cabinet uses SPCC cold roll steel material, firm and durable. It’s the simplest way to handle hundreds of cables.

cabinet for solving server room cabling nightmare

1U Rack Mount Fiber Enclosure

1U rack mount high density fiber enclosure is available for 4 fiber adapters or cassettes that can connect 96 fibers. The body is made of SPCC cold-rolled steel plate, finished with electrostatic powder spraying. It can maximize the use of limited space in a rack to protect and manage fiber cables with easy installation.

fiber optic enclosure

Server room cabling nightmare is the greatest challenge in the network system. To solve this problem, it should be done with the professional network solution supplier FS.COM. For more details, please visit FS.COM.


1U Rack Mount Enclosure Inside Cabling Installation

Rack cabling may be the backbone of one’s information technology operation. All data or signal are delivered by the cables, so maintaining and running the critical circuits that are managed by these cables are of great importance. Any mishandled cables on the key link paths can lead to bad results, such as data transmission errors or performance issues. So how to organize and protect fiber cables? This 1U rack mount enclosure will help you. First, let’s look at the structure of 1U rack mount enclosure.

Structure of 1U Rack Mount Enclosure

Before we properly use fiber optic patch panel, we should have a better understanding of its structure. The following 1U rack mount patch panel is from FS.COM. It can support 4 fiber adapter panels or MTP/MPO fiber optic cassette. The top cover can be removed, which is convenient when installing the adapter or cassette. Inside the enclosure, there is nothing except two fixed screw holes position, which enables users to settle the panels or cassettes. Each rack mount enclosure is shipped with an accessory pack that includes mounting screws, spools, bend radius brackets for proper installation and cable ties for cable management.

1U Rack Mount Enclosure

Devices Used for 1U Rack Mount Enclosure Inside Cabling

There is a video to show clearly how 1U rack mount fiber enclosure inside cabling works. Here, we need 24 fiber optical splice tray, LC fiber adapter panel and spliced fiber pigtail.

Splice tray is a device used with other equipment to hold and protect optical fibers. This 24 fiber optical splice tray is equipped with self-contained slacking and spooling, mechanical splice holder, self-stacking modules with side latches and clear plastic hinged cover, designed to safely route and store optical fiber.

LC fiber adapter panel is designed for use with FHD series rack mount enclosures, providing a good protection for cables.

Fiber pigtails are used in terminating fiber cables through fusion splicing, in order to achieve accurate mounting for precision alignment of fiber optical components.

1U Rack Mount Enclosure Inside Cabling Installation

According to the video, the installation can be divided into two parts, fiber optic splice tray installation and cassette or adapter installation.

Step one, install fiber optic splice tray first. Undoing the screw to remove the top cover. Put 24 fiber optical splice tray into the 1U rack mount enclosure, and align the screws at the screw holes, then use a screw to fix it. Position another splice tray upright the fixed one. The 1U enclosure can hold 4 splice trays. Last, use a cable tie to make sure the fiber cords at the right location.

Step two, install cassette or adapter. Place slack spools over plastic rivets studs on sliding tray in a new 1U enclosure, and use screw to fix slack spools. Then insert LC fiber adapter panels into the enclosure. Unplug dust caps and connect the fiber pigtails. Note that make the pigtails go through the grommet for dust prevention. Finally, close the top cover.

FS.COM developed the 1U rack mount enclosure inside cabling installation to guarantee the smooth operation and efficient cable management of customers’ network. More details, please visit FS.COM.

Dual Sided Vertical Cable Manager-Vertical Cable Management

As we know, proper cable management is part of one’s network’s performance and effectiveness. However, do you know what is the most difficult area of cable management? It’s the area on the equipment rack itself. You can manage the overhead cables by mounting them to the superstructure, and use a simple raceway-type solution to deal with the underfloor cables. But how to handle the rest cables vertically? Absolutely, You need a vertical cable manager. Vertical cable manager is used to house and organize fiber and copper cabling for good vertical cable management.

What Is Vertical Cable Manager?

Like the name implies, vertical cable manager is the equipment installed vertically. It can be installed on both sides of a rack or cabinet so that it can be called dual sided vertical cable manager. This kind of vertical cable management makes the utmost of the extra space of rack’s two sides to route fiber optic cables or patch cables effectively, while creating no impact on access to the equipment in the rack.

Dual Sided Vertical Cable Manager

Why We Use Dual Sided Vertical Cable Manager?

Some persons may ask, for cable management, I have selected the fiber patch panel, rack or cabinet to manage cables. Why do I still need to use the dual sided vertical cable manager? Let me answer it, because they are different cable management tools. Fiber optic patch panel is used to manage the equipment through the network cabling system. Data or signal can be delivered within a fiber patch panel, thus the data or signal can reach to the equipment successfully. A rack is the facility storing fiber patch panel, hard disk drivers and some computer correlation equipment. The dual sided vertical cable manager is just applied for tidying cabling which is along the sides of a rack. Remember, this equipment is not related directly with the network.

Using a dual sided vertical cable manager, technicians can snap off fingers, minimize downtime, maximize space, which brings a good network environment.

How to Use Dual Sided Vertical Cable Manager?

Here is a video to show you how the dual sided vertical cable manager works. It takes 45U 4.9″ Wide Plastic Dual Sided Vertical Cable Manager from FS.COM as an example. This product uses an oval hole design, making it easy for front-to-back cable routing. Flexible fingers on both sides ensure optimum cable radius not to damage cables. And to protect cables from damage or dust, the cable manager uses a PVC cover. After knowing the features of the product, let’s see how it works.

First, install the dual sided vertical cable manager. Put the plastic cable guide part on a flat surface. Then place the other cable guide over the connector brackets and press firmly until fully seated.

Second, position the cable manager next to the rack. Use the inserted brackets mount the vertical manager solidity to the rack. You can couple two 22.5U sections together. After that, insert each door into the hinges and press it tightly until it quickly settles.

Last, route cables through fingers of the dual sided vertical cable management.

Conclusion

Dual sided vertical cable manager is the compact and versatile solution in the server room or data center. With rich experience in this realm, FS.COM is engaged in offering best and excellent quality products of vertical cable management.

How to Connect Fiber Optic Cable to Fiber Optic Patch Panel

Fiber optic cable is usually terminated in two ways. One is using connectors that pairing two cables to set up a link, and the other way is connecting the fibers to some network equipment such as fiber optic patch panel or switch for better cable management. No matter which terminations it uses, fiber optic cable should be installed in a manner with less signal loss. However, how to connect fiber optic cables to fiber optic patch panel correctly? Today, we will talk about the steps of this process. First, let’s have a overview of patch panel.

Types of Patch Panel

Patch panel is defined as the interface between multiple optical fibers and optical equipment. It’s a termination unit that helps networking and fiber distribution from wiring closet to various terminal equipment. Patch panel are divided into two types based on different designs, the wall mount and rack mount category. Both types can house, organize, and protect fiber optic cable and connectors.

Wall mount fiber patch panel is usually fixed on indoor walls with low-profile and compact design. It has a terrace that can provide a flexible cabling system. This patch panel is a suitable device for on-site installation of pre-connected cables and connectors.

Rack mount fiber patch panel is an indoor network equipment which is designed for standard 19 inch rack mounting. It’s available in 1U, 2U and 4U size due to different connection demands. This type can accommodate all kinds of fiber adapter ports like SC, LC, ST, FC and so on.

Structure of Fiber Optic Patch Panel

A typical fiber enclosure consists of four elements with different uses. They are enclosed chamber for installing adapter panels for holding, connector adapters for mating and splice tray for organizing. Thus, technicians can use a fiber optic patch panel to terminate fiber optic cables in a tidy and secure way. In addition, with assistance of a patch panel, they can also install, repair and upgrade networks quickly and efficiently.

Steps of Connecting Fiber Optic Cable to Fiber Optic Patch Panel

It’s important to make a right connection between cables and fiber optic patch panel so that the device can run well. Following the steps, you can do it.

  • A fiber optic patch panel should be prepared first and make sure this work will be done on a clean and level work surface. Patch panel is supplied empty, so the adapters should be inserted into the mounting plate. Then fix the mounting plate in position.
  • Prepare cables based on standard termination procedures and ensure there is enough surplus cable to work with. Connect the cable by fixing the gland and roll the excess fiber onto the spool. After that, remove the protection cap and insert into position in the adapter. Once the cables are all attached, it’s better to use a zip tie to secure the cables in a bundle.
  • Label each jack location on the fiber optic patch panel so as to distinguish the cables. Finally, mount the patch panel in a rack or cabinet.

optical fibers in patch panel

Conclusion

Fiber optic patch panel is a cost-effective way for cable management. Connecting fiber optic cable to patch panel is easy and can actually optimize the network work. So why not have a try?