Tag Archives: server rack

Cheap Server Rack for Home—Building Your Own Home Server

The continuous development of IT and communication equipment has made computers or storage devices an entirely new look. Server rack cabinet also has evolved. In the network industry, a set of standards has been published successively in order to provide a criterion of racking and mounting size for users. Today, in data center of server room, there are various types of computing or networking equipment installed in wall mount server rack or ground standing type. But for home use, we need a home server rack to build our own home server. Here we’ll focus on cheap server rack for home.

Why We Need Cheap Server Rack for Home

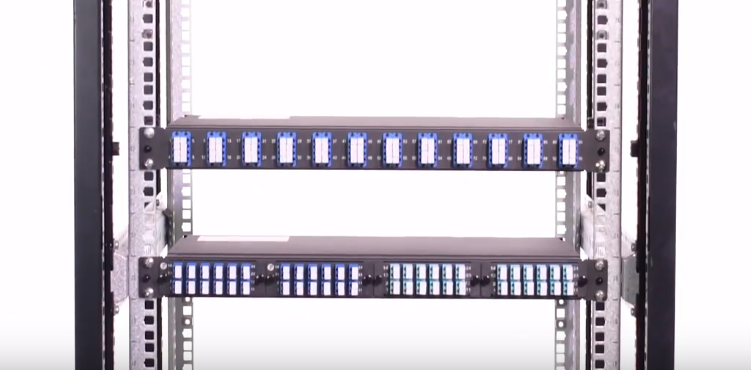
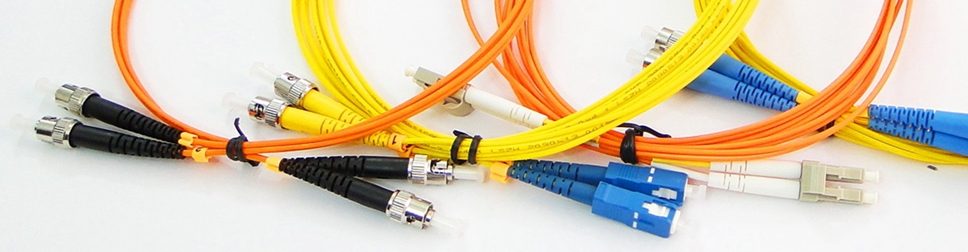
As we know, server rack is a cost-effective solution and is important to one’s business. Because it provides a space for vital equipment like fiber optic patch panel that is crucial to the survival of your organization. However, for home use, what is the exact reason.

First, with the technology develops, our homes also become smarter, more and more families consider to use a home server rack to build a more secure and storage network for the IoT in the home. Therefore, they can manage the electronic equipment more efficiently.

Second, people like professional gamers, videographers, designers and others who require substantial processing power want a home server rack to set up a home network for information transmission at a higher and safer path.

How to Choose Cheap Server Rack for Home

Here are some suggestions for choosing a cheap server rack for home.

  • Size. Traditional server racks are just with large metal frames like server rack 42U type. That’s fine in a professional environment. Unlike the data center or server room, server rack for home don’t need such large type. Small server rack like 9U—24U is preferred for home use.

  • Price. Price is always an important factor when buying anything. Luckily, due to the small design, home server racks are much cheaper than the ones in a large data center. But for the people who want a small server rack just for studying or hobby but don’t have enough money, then a used server rack is the right one for them.

Where to Buy a Cheap Server Rack for Home

Finding the right home server rack for building a home server, from reliable quality to the right price may be tricky. Here, FS.COM is the reputable source to buy a home server rack. Because not all installation sites at home are enough, so I recommend you a wall mount server rack.

cheap server rack for home

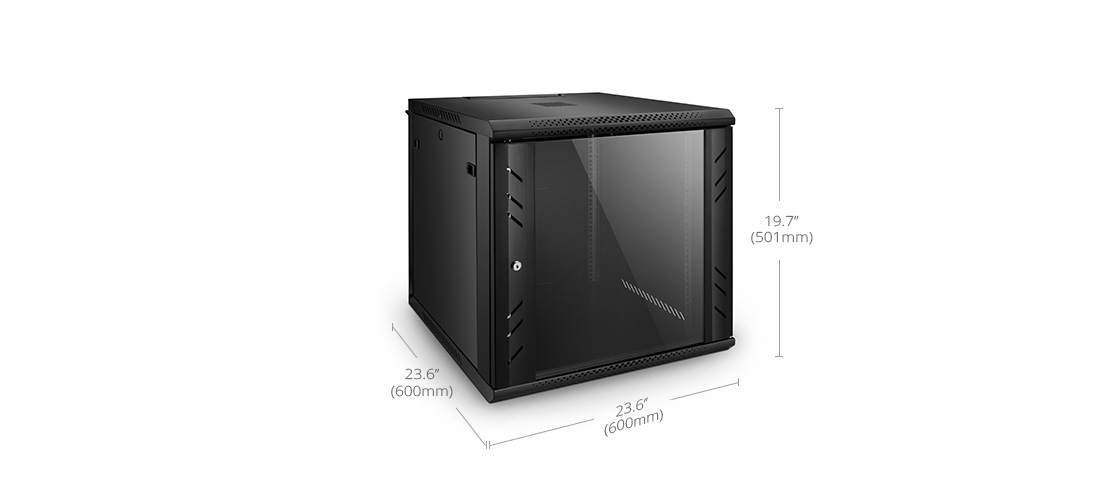
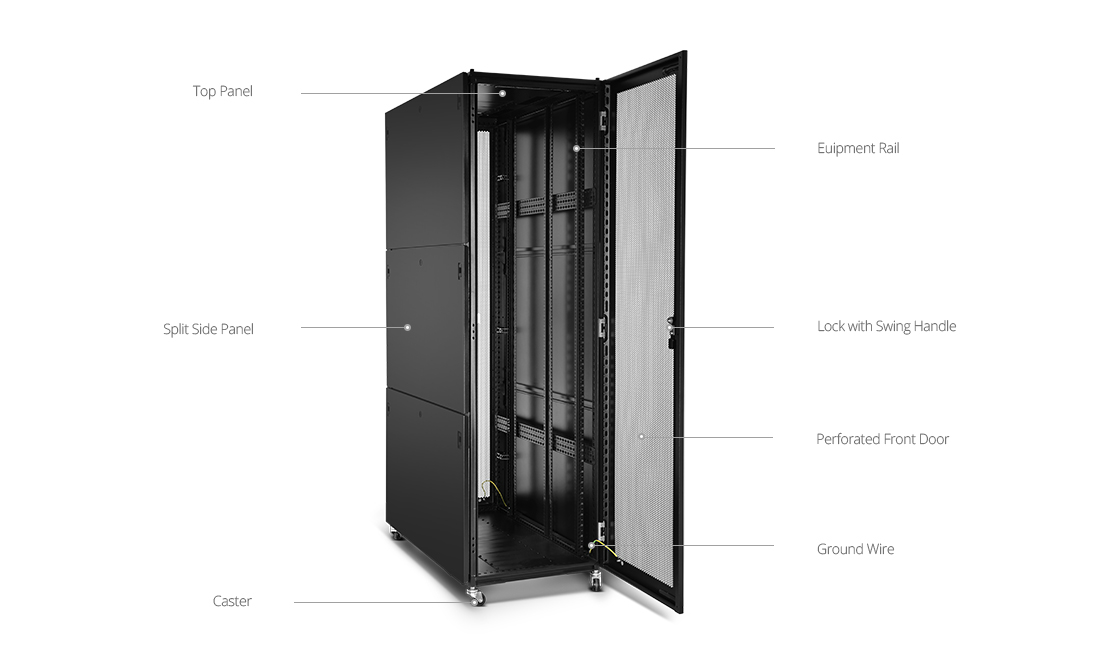
Figure: Home Server Rack

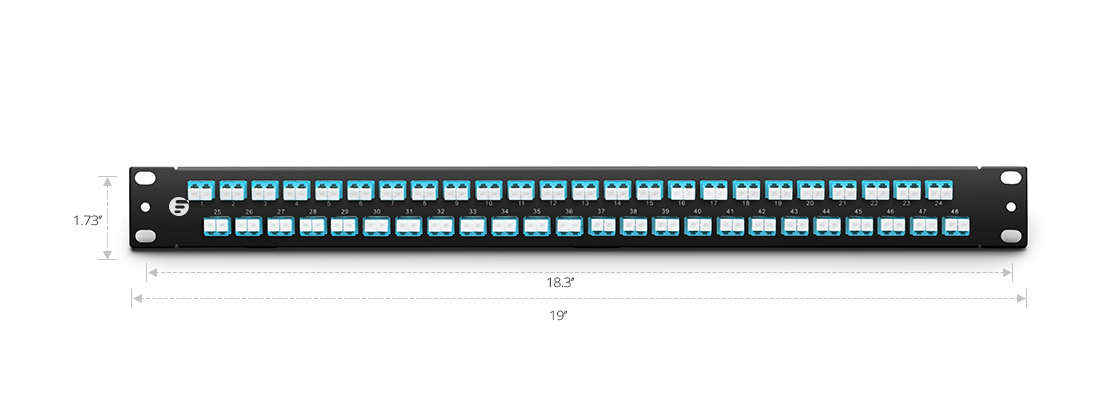
This 9U wall mount network rack lets you mount your equipment of 19 inch to the wall, in a secure enclosure. It supports 4 post mounting and is designed with a vented glass front door. Made of high quality SPCC cold roll steel material with black coated, it can support a total load capacity of up to 60kg. This wall mount rack makes it easy to install your equipment such as 24 port patch panel or a server rack shelf.

Conclusion

I think the above article will help to choose a cheap server rack for home so as to build your own home server. At FS.COM, you can find lots of different types of server racks. If you need help with picking, welcome to contact us via support@fs.com.

How Much Do You Know about 1U Horizontal Cable Manager

1U horizontal cable manager is the ideal solution to manage cables on the front and rear of each 19 inch server rack. Because with the emergence of high density rack-based IT server installation, data communication and cabling that must be processed within the tight rack space. Horizontal cable manager is regarded as the horizontal cable organizer, which can avoid cable damage and failure, ensuring the network operation.

Why Do We Need 1U Horizontal Cable Manager

1U horizontal cable manager is one tool of cable management that matter the whole network system health. It offers a neat and simple way to manage the cables, and simplifies network maintenance and costs. This is the main reason that makes it popular in the data center.

For the technicians who want a clean and orderly work area, they can make the cables go through the 1U horizontal cable manager, creating a clean look for the rack.

For the technicians who have a desire for easy maintenance and low costs, the cable manager can help them protect the cables radius bend and reduce the wear and tear, which decrease the cables expenses in some sense. Besides, it provides easier access to internal rack components, performing easy move, adds and changes to connections, which can greatly save time and money.

How to Select 1U Horizontal Cable Manager

FS.COM offers some styles of 1U horizontal cable management tools with different options of cable support. Choose the appropriate cable management device based on your actual needs.

1U Horizontal Cable Manager With End Rings

This cable manager uses a sturdy SPCC metal construction with a max cable capacity of 70. Due to the design of four D-type rings on the panel and two rings on both sides, it can manage vertical and horizontal cabling at the same time. In addition, the rings can provide cable strain relief for more reliable connections.

1U horizontal cable manager with end rings

1U Single Sided Horizontal Cable Manager With Finger Duct

It’s a solid little cable manager with flexible fingers on the front, which can offer a proper bend radius protection. Although the manager is made primarily from plastic material, it’s extremely tough and has excellent wear resistance. The max cable capacity of this single sided horizontal cable manager is 44. Furthermore, there is a detachable cover on the fingers that can protect the cables from the dust and give you a more professional rack looking.

1U single sided horizontal cable manager with finger duct

1U Blank Rack Mount Fiber Patch Panel With Cable Management Panel and Lacing Bar

It has five rings stand vertically on the front panel. The lacing bar is dismountable that allows users to put it on the front or back of a server rack according to their cable management demand. With the black metal design, it tends to be highly durable which reduces the equipment spending.

1U blank rack mount fiber patch panel with cable management panel and lacing bar

If you want to house the vertical and horizontal cables simultaneously, 1U horizontal cable manager with end rings is an economical choice. If you are in favor of a dustless environment, 1U single sided horizontal cable manager with finger duct can satisfy your requirement. If you want a more flexible cable solution, then choose 1U blank rack mount fiber patch panel with cable management panel and lacing bar.

Manage cables in the server rack with FS.COM 1U horizontal cable manager. These cable management devices are made from the highest quality materials to provide an unique method for the cross connect.

Patch Panel Installation Guide

It’s well known that network technology is changing, but the critical aspect can’t be changed or replaced—patch panel cable management. If the key component is missing, the data transmission will be interrupted and fail to arrive at the destination. Patch panels, as the nerve center of a network system, can ensure the signal to work in ordered and friendly way. But how to install patch panel? And what’s the patch panel installation guide? This article will give you several suggestions.

Types of Patch Panel  

Patch panels are available in copper and fiber cables. And designed with different port types and uses, patch panels from FS.COM are divided into 24 LC fiber port patch panel, 24 port SC fiber patch panel, 48 port LC fiber patch panel and so on, and copper patch panel can fall into 24 port cat6 shielded/unshielded patch panel, 24 port cat5e shield/unshielded patch panel and 24 port blank keystone patch panel. Here, we will take the 48 port LC fiber patch panel as the example to explain the patch panel installation.

48 Port LC Fiber Patch Panel

With the size of 19”×1.73”, this fiber optic patch panel is suitable for installing on the 19 inch server rack. It has duplex LC adapters that allow a two-way data transmission between the connecting devices. The 48 port LC fiber patch panel uses C.R.S powder coating, which is fully in line with national environmental standards, can be placed indoors. High density port design makes it connect 96 OM3 or OM4 fibers at most, which is much more than the 24 port patch panel.

48 Port LC Fiber Patch Panel

Patch Panel Installation Guide

Only follow the right steps can achieve a reliable network. There are two aspects of patch panel installation guide for your reference.

  • Planning. A successful work starts with a good planning. You should figure out the issues, the network speed, distribution location, and cables length. Make sure you know the specification and design of the patch panel installation.

  • Preparation. Preparation work can reduce disconnect time. Prepare the main tools, 1U rack mount fiber enclosure, 48 port LC fiber patch panel and screws. Check the cable length for ensuring the cables that could be long enough to pull. And label the ports to identify different cables, in order to guarantee the technicians to have clear information on what they need to do.

Installation of 48 Port LC Patch Panel in a Server Rack

First, we should install the 48 port LC patch panel in the 1U rack mount fiber optic enclosure. Remove the front panel of 1U rack mount fiber enclosure, then install 48 port LC patch panel and fasten the screw.

Second, fix the equipment in the server rack. And leave some space between the patch panel and other devices, for cables management and future change.

Patch Panel Installation Guide example

Third, try to connect OM3 or OM4 cables to the patch panel in one pull, which helps to protect the bend radius. Comb and bundle the cables, and put them into the patch panel trunking, then cover it with top panels.

Last, don’t forget to clean the work area when you finish the patch panel installation, because the optical fibers are sensitive to dust and dirt. Therefore, try to keep clean when working with fiber optic cables to make them achieve their full performance.

FS.COM offers a vast selection of patch panel installation products and accessories that meet the international standards for supporting your network needs. For more details, please contact us via sales@fs.com.

How to Deal with Server Room Cabling Nightmare

It’s well known that server room has become an important indicator of one’s healthy network. Although wireless technology can avoid the possibility of cable clutter when compared with the wired connection, sever rooms still have lots of network cables, fiber optic cables and peripheral wiring. Thus server room cabling nightmare may appear if the big amount of cables on the server rack is disordered. For installers and engineers, it’s important to avoid server room cabling nightmare to ensure a well operated network center.

Reasons to Avoid Server Room Cabling Nightmare

Often times, the server room cabling nightmare is related to crowding and stacking things. For example, new equipment may be piled up around or on the top of the old equipment. Disordered cables look like a big bowl of spaghetti that may wreak havoc on the server environment.

  • It costs you in equipment wear and tear. When the excessive cables and extra equipment are placed together in a server rack, it may result in equipment overheating since the cables block the airflow or ventilation, generating much heat and stress, which may eventually lead to slow-down and even shorten the life of all equipment.

  • It costs you time and money. The fiber cables and power cables will easily become twisted if the cables are not managed well. In turn, this will cost you a large amount of time to dig through the server mess when you want to change the specific or broken cables.

Tips for Organizing Server Room Cabling

To avoid server room cabling nightmare, here are several tips for you to organize the cabling.

  • Make the server room dust-free. Dust not only makes the room look dirty, it also can fall into the hardware and cause equipment failure especially when it piles up inside the hardware vents. Therefore, the heat can’t be dissipated from the equipment which will lead to overheating. Thus, the server room should be cleaned every day to prevent dust accumulation.

  • Apply sound cable management. Poor cable management will not make positive effects on network system, instead, it may cause hardware malfunction. Proper cable management tips contain the colored labels for identifying, suitable fiber optic enclosures for cable managing. In this way, the cables can be protected from winding.

  • Spacing the equipment. When you decide to set up the server room, make sure that you have planed where to place the racks. A suitable distance should be measured between each rack for air dissipation and future expansion. In addition, the location of equipment such as fiber optic patch panel and switches in a rack should be considered.

End Server Room Cabling Nightmare with FS.COM Equipment

There are several equipment from FS.COM to help you maintain a neat and tidy server room, avoiding server room cabling nightmare.

42U Server Cabinet  

42U black server cabinet can accommodate all 19 inch EIA standard networking equipment, providing additional space at the rare for cable management. It consists of several major components, top panel, split side panel, equipment rail, and perforated front door. In the back, it adopts the design of air mesh which allows ventilation and heat dissipation. The cabinet uses SPCC cold roll steel material, firm and durable. It’s the simplest way to handle hundreds of cables.

cabinet for solving server room cabling nightmare

1U Rack Mount Fiber Enclosure

1U rack mount high density fiber enclosure is available for 4 fiber adapters or cassettes that can connect 96 fibers. The body is made of SPCC cold-rolled steel plate, finished with electrostatic powder spraying. It can maximize the use of limited space in a rack to protect and manage fiber cables with easy installation.

fiber optic enclosure

Server room cabling nightmare is the greatest challenge in the network system. To solve this problem, it should be done with the professional network solution supplier FS.COM. For more details, please visit FS.COM.


Structured Cabling Installation

Structured cabling installation is the main part of a flexible structured cabling system that will support different hardware uses and satisfy current and future demands. Since the thousands of forms of online data transfer, and the gathering of business intelligence has made a significant influence on today’s commerce, the companies want reliable and structured cabling installation to hold the infrastructure of data connections. Now, I want to share something about its installation with you.

Importance of Structured Cabling Installation

A proper structured cabling installation gives a universal platform on which you can build the overall information strategy, supporting multiple voices, data and media system, regardless of who manufactures these. In essence, compared with traditional point to point cabling system, the structured cabling system is more neat and organized. It has many benefits for one’s network operations.

Support future upgrade. High bandwidth is the most significant benefit of the structured cabling, which makes it a reliable infrastructure for business data growth. With structured cabling, you can ensure connectivity of the enterprise while business divests into new technological areas and equipment.

Reduce cabling bulk and congestion. The organized and planned cabling system can accommodate smaller diameter trunk cabling, and makes a cleaner cable management.

Reduce installation time and cost. Using a structured cabling system, users just need to plug the equipment cables into the matched sockets when upgrade or change the network. No need to buy additional wires or adapters.

Tips for Structured Cabling Installation

Since the structured cabling is the critical part of one’s network, here are several tips for the proper installation.

Planning comes first. In this stage, you must have a comprehensive understanding of your actual needs, figure out a solution based on the location, cabling types, and the needed equipment. Planning the installation will enable the actual work and operations run more smoothly.

Follow the cabling standards. When you install the cables, please follow the cabling standards because there are standards that have specified the multiple cables for different uses. Following the standards will greatly improve the efficiency of cables and data networks.

Remember the maintenance is important. Once the cables are installed, the maintenance becomes important. Buy a server rack or other equipment to manage and maintain the cables, which will save you lots of money and time in reality.

Choose the Right Equipment for Structured Cabling Installation

Vertical cable management and horizontal cable management are the two methods used in structured cabling installation. Choose the right equipment is the top priority. There is some equipment from FS.COM.

Single sided and dual sided vertical cable manager are available on FS.COM. This 45U 4.9″ wide plastic single sided vertical cable manager is designed with flexible fingers to protect cable radius against damage. It can route cables vertically either on the front or back of racks. With a PVC cover, the equipment can avoid the dust and increase service life.

vertical structured cabling

1U 19inch blank rack mount fiber patch panel is commonly used for horizontal cable management. It offers different choices for one’s application by being separated into patch panel, D-rings and lacer bar. This equipment is a cost effective cable management solution used in high density cabling system in data centers and telecommunication rooms.

horizontal structured cabling

From the above, we know structured cabling is the backbone of all business. FS.COM is the “one stop shop” for all cabling installation.