Tag Archives: Fusion Splicer

How to Maintain Your Fiber Optic Fusion Splicer?

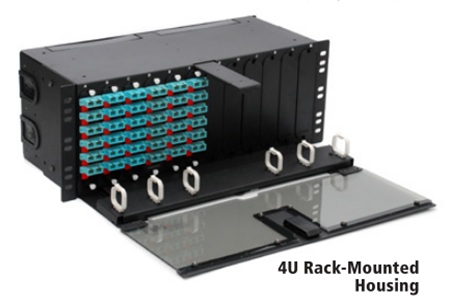
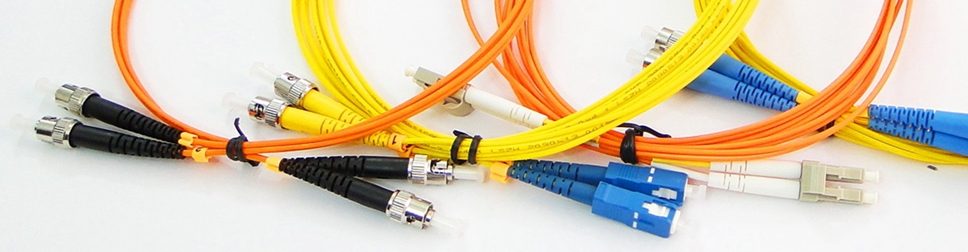
Fiber optical splicing is the act to joint two fibers together by using heat. Generally, there are two types of optical splicing: mechanical splicing and fusion splicing. Fusion splicing cannot be completed without a piece of equipment called fusion splicer. However, you can’t just use it without any maintenance. Do you know how to maintain it in your daily work? Today, this article is to give you some advice for your fusion splicer maintenance.

What Is Fiber Optic Fusion Splicer?

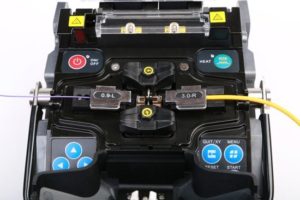
Fiber optic fusion splicer uses an electric arc to melt two optical fibers at the level of their faces to end and form a long fiber. It connects two fibers permanently so that the optical signals can be transmitted in the fiber with a very low loss.

fusion-splicer

How Does a Fusion Splicer Work?

Before we know how to maintain our fusion splicers, we need to make sense how it works. Only when you know clearly its work process can you get how to avoid some unnecessary mistakes which may cause great damage to your fusion splicer.

Usually, before starting a fusion splicing, the preparations need to be finished: removing all the protective coating, completely clean and then precisely cleaving to form a smooth and perpendicular end faces. When all of these have been done, the fiber optic fusion splicer takes over the rest of the process which includes three steps.

Alignment. With the help of a small but precise motor, the fusion splicer makes tiny adjustments to the fibers’ positions until they are aligned properly. During this process, the fiber optic workers can view the fiber alignment by optical power meter video camera or viewing scope.

Impurity Burn-Off. Since the slightest trace of dust or other impurities can affect the transmission of optical signals, cleaning is always the first important thing needed to be done. Before fusing, fusion splicer can generate a small spark between the fiber ends to burn off the remaining dust or moisture.

Fusion. After fibers have been aligned and thoroughly cleaned, it’s time to fuse the fiber ends together. The splicer emits a second, large spark that melts the optical fiber end faces Then the melted fibers are jointed together.

Daily Care and Maintenance

Now we have know how the fusion splicer works, it’s time to learn something on how to maintain fusion splicer to make sure the fusion procedures go on wheels. Here are some tips on how you can maintain your fusion splicers. These tips are mainly about the cleaning in the fusion process.

Cleaning Before Splicing
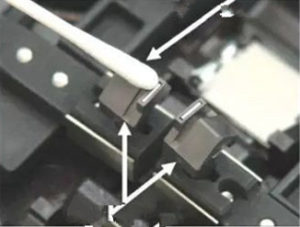
  • Clean the V-groove. If there are contaminants in the V -groove, it cannot clamp fiber properly and will cause unnecessary optical loss. Therefore, the V -groove should be checked and cleaned regularly. Generally, a thin cotton swab dipped with alcohol can be used to clean V-groove. If it doesn’t work, first you can use a fiber that has been cleaved to remove the contaminants, and then clean the V -groove with thin cotton swab.

cleaning-fusion-splicer

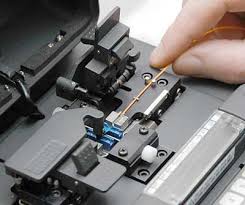
  • Clean the Fiber Clamp. If there are dusts on the fiber clamp, it may lead to poor fiber connections. So the cleaning of fiber clamp cannot be ignored in your daily work. Firstly, cleaning the surface of fiber clamp with a thin cotton swab dipped with alcohol. Then dry the clamp with a dry cotton swab.

cleaning-fusion-splicer

  • Clean the cleaver. Always keep in mind that the cleaver blade should be kept clean, or it will bring dust to the fiber end face, resulting big splice loss. The method to clean the cleaver blade is to clean it with cotton swab.

fiber-cleaver

Regular Inspection and Cleaning

In order to ensure the quality of fusion splicing, it’s recommended to do regular inspection and cleaning for the fusion splicer. The check items include objective lens, windshield and electrodes.

Conclusion

In summary, it’s vital to maintain fusion splicer to ensure a precise fusion splicing. Of course, good maintenance is necessary, but obviously a good fusion splicer is more important. Fiberstore provides various types of fiber optic splicer and some other accessories which can make splicing much easier and more stable. If you want to know more, please visit FS.com.

How to Select the Basic Materials of the LAN

Installing or designing network may pose a challenge as there are multiple optical solutions that meet the same specification or requirement. But by understanding the basic optical components and the specific performance requirements, you will be able to generate a cost-efficient bill of materials for your project. Thus before picking any products for your infrastructure, you must read this article.

Fiber Type
There are two basic fiber types: single-mode and multi-mode. Multi-mode fiber is graded by OM (optical multi-mode), the higher the OM grade, the better bandwidth performance you can expect. And it comes in both 50μm and 62.5μm core sizes with 50 μm multi-mode available in both standard (OM2) as well as a laser-optimized version (OM3/OM4). Single-mode are graded by OS (optical single-mode) and can run at OS1 and OS2, as described in TIA-568 C.3. Keep the consistency within your network is critical for long-term performance, therefore you shouldn’t mix new fiber type or performance with your old plant.

single-mode vs.multi-mode fiber transceiver

In addition, the cost of the components should be considered. The transceiver associated with single-mode fiber are more expensive than those for multi-mode. For example, the price of JG661A (compatible HP 40GBASE-LR4/OTU-3 QSFP+ transceiver) is much higher than JG325B (compatible HP 40GBASE-SR4 QSFP+ transceiver). The decision must be made to balance the performance and the cost. Single-mode system will provide for future expansion, yet multi-mode fiber is only for today and the near future. To sum up, single-mode fiber operate better at long reach while multi-mode fiber is ideal for short reach, choosing single-mode or multi-mode depends on your networks needs.

Termination Method
Deciding on a termination methods is typical affected by many factors. If your biggest concern is time, no epoxy/no polish connectors are probably your best choice. The fiber end faces are factory polished and easily installed with a tool kit. This types of termination method allows you to perform terminations quickly, but the cost is usually higher than that of epoxy and polish connector.

If your biggest concern is cost. epoxy and polish connectors might be a good fit because of their low initial price. This type of termination need considerable time to learn how to properly hand-polish connectors that meet specification, and it requires a large workspace to lay out the polishing papers, polishing pucks, epoxy, etc. If your work environment or network condition is not allowed, it is advisable not to select this method.

Fusion Splicer or Optical Connector
Keep in mind that whether to choose fusion splicing or a connector for your network will always need an experienced installer under adequate training. Fusion splicer, as we all know, is very expensive. If your company do not own one, it can be a large investment to make and you need to order the correct splice tray for your hardware and heart-shrinks to keep your splices intact. But if you already have a fusion splicer, fusion-spliced pigtails might be the right choice for you that can provide high quality results and easy to use in areas. The following picture shows a Fujikura FSM-80S Core Alignment Fusion Splicer.

Fujikura FSM-80S Core Alignment Fusion Splicer

Specifications, density, electronics interfaces and existing plant often drive connector choices. LC connector is favored for its maximum density and room-saving. It is also available in duplex from, which allows you to manage polarity by simply reversing the connector via a duplex clip. SC connectors feature an easy push/pull locking mechanism and are available in simplex and duplex forms. ST compatible connectors have a spring-loaded bayonet locking system that helps them stay in place but are only available in simplex versions.

Hardware
To determine the type of hardware you need, take into consideration the space that will be utilized for the network. If you are installing inside of a closet or other cramped quarters and need low density, wall mountable hardware is the best selection as it does not take up a lot of room. If racks are already in place, or if there is enough room to install them, rack-mount hardware is the best selection because it is sturdy and easy to access.

Rack-mount housing

Additional Information
Designing a network may be a big project as you should take a lot of things into consideration. To make sure the high performance of you network, please think about all the aspects that I have written in this text. What’s more, there are three basic categories for cable: indoor, outdoor and indoor/outdoor. The types of cables you have to choose for your infrastructure depend on where the cables will be run. Fiberstore supplies a whole variety of optical equipment including fiber optical cables, optical transceivers, fusion splicer and optical connectors. Come to us to help your data transmission initiatives for future proof.